A popular method for coloring stamped images is the “Magic Colored Pencil” technique, which uses a solvent to blend the colored pencils, eliminating pencil lines and leaving a watercolor-like effect. The original version of this technique used PrismaColor Premier colored pencils and Gamsol odorless mineral spirits, with wonderful effect. A while ago
I became curious about the technique, and wondered if there were a less expensive alternative to the expensive technique. I often travel, and also often share my stamping materials, so I thought it would be wonderful to have an alternative that I wouldn’t mind sticking into my travel case and sharing with a group.
I had heard that Goo Gone worked well in place of the Gamsol, and that its orange odor bothered some people a lot less than the “odorless” fumes from the Gamsol. Being asthmatic, and suffering from occasional migraines, the fumes were a concern, so I thought I’d check out the Goo Gone.
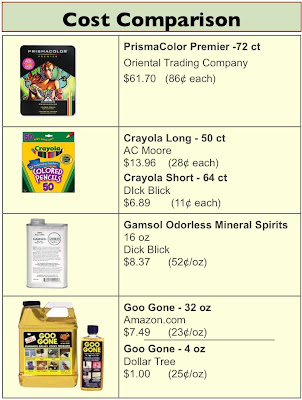
I also decided I’d check out something else while I was at it. I have used Crayola colored pencils since my childhood, and have always enjoyed their bright, vivid colors. I am especially a fan of their short pencils, which are inexpensive and highly portable. To the right you can see the price comparisons.
I opted to compare the results of the blending technique on each of the types of pencils with each of the types of solvents, and thought I’d share my results with you. I used a two-tipped rolled paper stub for this experiment, using one end of the stub for mineral oil, and the other for Goo Gone. I wanted to make sure I was as consistent as possible. I used a single sheet of white card stock for the comparison.
As you will see from the photos on the next page, the results with the Crayola/Goo Gone are quite comparable to the PrismaColor/ Gamsol.
Preparation

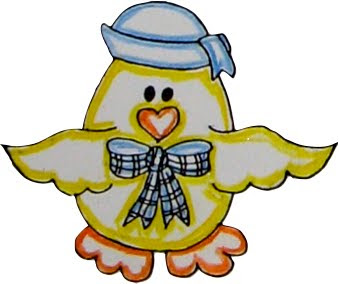
I stamped my “Just Ducky” image four times, using Versafine™ black ink. The two images on the top of the page were colored with PrismaColor pencils, while the bottom two were colored with Crayola. I used the outline method of applying color, putting down color around the edges of the image, only.
Blending
I blended each image, a single color at a time, using the stub, which I sanded down between colors. I used only Gamsol on the images on the left, and only Goo Gone on the images on the right.
Results
Can you see an appreciable difference between the quality of these images? I certainly couldn’t, with the exception of the brighter yellow and orange in the Crayola images and a slightly darker blue in the PrismaColor images.
They all came out “Just Ducky” to me!

All four images worked well, with color-blending nearly effortless. Both blending media worked well, though I felt it was a little easier to move the color with the Goo Gone. That could be an advantage, or a disadvantage, depending on what one is trying to do. I found that with both of the images with the PrismaColors, I had a little trouble with picking up black from the ink for the image itself, even though those were the first two images stamped. I probably should have heat-set the Versafine ink. I did not experience the same problem with the Crayola pencils.
The largest differences in the pencils were in how easily the color laid down and in the colors themselves. I found the PrismaColors a little softer and smoother, and thus a little easier to lay down.
But for the expense of both the pencils and the blending materials, I think I will likely travel with Crayola and Goo Gone from now on!
Follow-up
I have been using the Crayola/Goo Gone combination for a while now. However, a couple of days ago, I spilled half my little bottle of Goo Gone onto a nearly finished project. The project was ruined as the Goo Gone left behind a stain on my colored card-stocks. I suspect the Gamsol would have done the same. But the spill definitely spurred me to find a way to use my blending liquid.
I found a set of two little iGo brand travel jars at one of my local stores, for a mere $0.89 for the pair. I also got a package of round makeup sponges. I was able to compress one of the makeup sponge and fit it into one of the jars. It fit quite neatly! I then poured just enough Goo Gone onto the sponge to saturate it. When I want to blend my pencil, I simply press my paper stub against the sponge and just enough Goo Gone is transferred to the stub. The cap fits tightly on the jar and the jar has a much lower likelihood of getting spilled over than the little bottle. I think I won't have to worry about another card getting ruined by a spill!
